
วันเสาร์ที่ 21 กันยายน พ.ศ. 2562

วันเสาร์ที่ 31 สิงหาคม พ.ศ. 2562
วันอาทิตย์ที่ 23 มิถุนายน พ.ศ. 2562
วันเสาร์ที่ 15 มิถุนายน พ.ศ. 2562
วันพฤหัสบดีที่ 25 เมษายน พ.ศ. 2562
วันพุธที่ 24 เมษายน พ.ศ. 2562
วันจันทร์ที่ 5 พฤศจิกายน พ.ศ. 2561


วันอังคารที่ 30 ตุลาคม พ.ศ. 2561
ESP8266 + GPS + Realtime tracking +HTML+No need app

MAP I/O

Wiring
Node MCU >> GPS
D1 (GPIO 5) >> RX
D2 (GPIO 4) >> TX
3V >> VCC
GND >> GND

GPS(Global Positioning system )

NMEA(National Marine Electronics Association) structure
$GPRMC,162254.00,A,3723.02837,N,12159.39853,W,0.820,188.36,110706,,,A*74
$GPVTG,188.36,T,,M,0.820,N,1.519,K,A*3F
$GPGGA,162254.00,3723.02837,N,12159.39853,W,1,03,2.36,525.6,M,-25.6,M,,*65
$GPGSA,A,2,25,01,22,,,,,,,,,,2.56,2.36,1.00*02
$GPGSV,4,1,14,25,15,175,30,14,80,041,,19,38,259,14,01,52,223,18*76
$GPGSV,4,2,14,18,16,079,,11,19,312,,14,80,041,,21,04,135,25*7D
$GPGSV,4,3,14,15,27,134,18,03,25,222,,22,51,057,16,09,07,036,*79
$GPGSV,4,4,14,07,01,181,,15,25,135,*76
$GPGLL,3723.02837,N,12159.39853,W,162254.00,A,A*7C
$GPZDA,162254.00,11,07,2006,00,00*63
In this project We need only coordinate then We need only "$GPGGA"
$GPGGA,162254.00,3723.02837,N,12159.39853,W,1,03,2.36,525.6,M,-25.6,M,,*65
GGA - essential fix data which provide 3D location and accuracy data. $GPGGA,123519,4807.038,N,01131.000,E,1,08,0.9,545.4,M,46.9,M,,*47
Where:
GGA Global Positioning System Fix Data
123519 Fix taken at 12:35:19 UTC
4807.038,N Latitude 48 deg 07.038' N
01131.000,E Longitude 11 deg 31.000' E
1 Fix quality: 0 = invalid
1 = GPS fix (SPS)
2 = DGPS fix
3 = PPS fix
4 = Real Time Kinematic
5 = Float RTK
6 = estimated (dead reckoning) (2.3 feature)
7 = Manual input mode
8 = Simulation mode
08 Number of satellites being tracked
0.9 Horizontal dilution of position
545.4,M Altitude, Meters, above mean sea level
46.9,M Height of geoid (mean sea level) above WGS84
ellipsoid
(empty field) time in seconds since last DGPS update
(empty field) DGPS station ID number
*47 the checksum data, always begins with *
If the height of geoid is missing then the altitude should be suspect. Some non-standard implementations report altitude with respect to the ellipsoid rather than geoid altitude. Some units do not report negative altitudes at all. This is the only sentence that reports altitude.
GPS module : https://goo.gl/UbMufK
GPS Module Banggood : https://goo.gl/2JmreQ
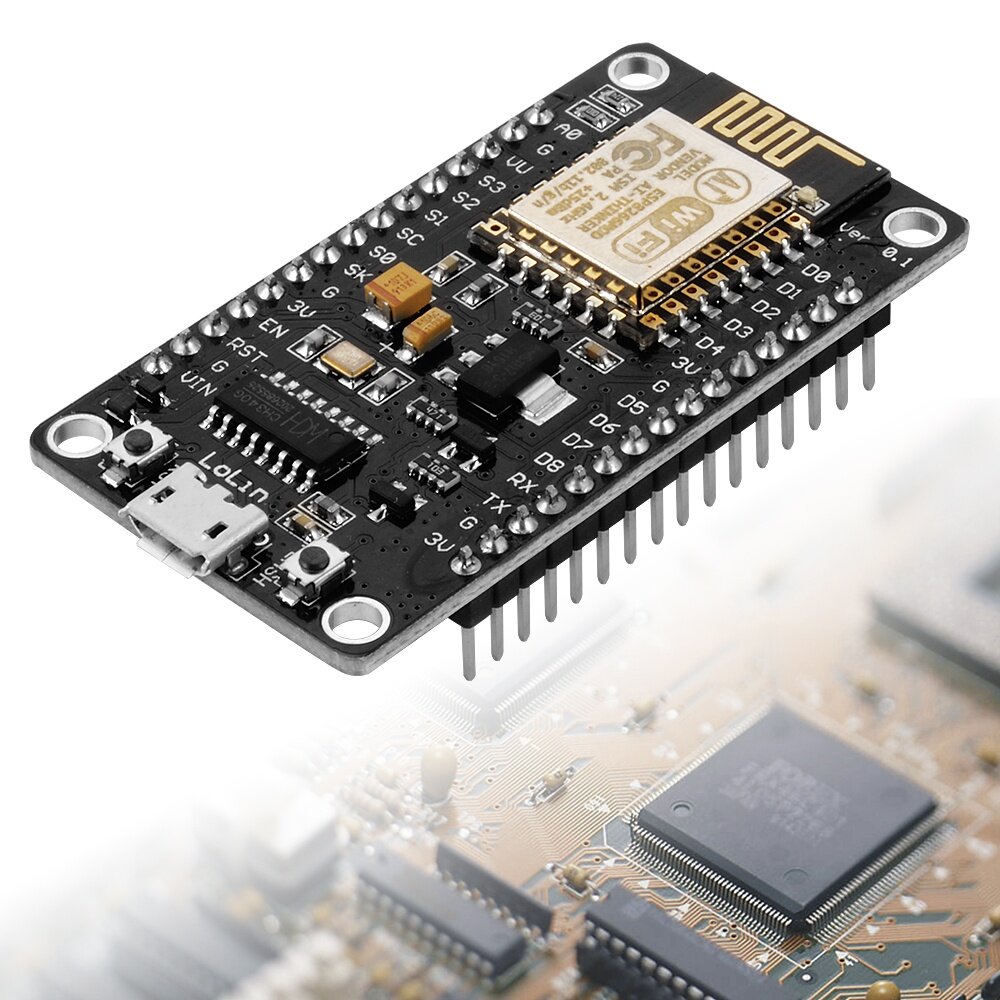
ESP8266 NodeMCU : https://goo.gl/7MoawN
ESP8266 NodeMCU Banggood : https://goo.gl/cBFyZ3
Please Donate for long life blog
ขอเชิญร่วมบริจาค เพื่อสนับสนุนทุนการทำโครงงานต่อไป
ขอเชิญร่วมบริจาค เพื่อสนับสนุนทุนการทำโครงงานต่อไป

Click Link : https://paypal.me/aarduinothai
CODE
#include <SoftwareSerial.h>
#include <TinyGPS++.h>
#include <ESP8266WiFi.h>
#include <ESP8266WiFiAP.h>
#include <ESP8266WiFiGeneric.h>
#include <ESP8266WiFiMulti.h>
#include <ESP8266WiFiScan.h>
#include <ESP8266WiFiSTA.h>
#include <ESP8266WiFiType.h>
#include <WiFiClient.h>
#include <WiFiClientSecure.h>
#include <WiFiServer.h>
#include <WiFiUdp.h>
TinyGPSPlus gps;
SoftwareSerial ss(4,5); // for connect GPS
const char* ssid = "santi";
const char* password = "santi12345678";
float latitude , longitude;
int year,month,date,hour,minute,second;
String date_str,time_str,lat_str,lng_str;
int pm;
WiFiServer server(80);
void setup()
{
Serial.begin(115200);
ss.begin(9600);
Serial.println();
Serial.print("Connecting to ");
Serial.println(ssid);
WiFi.begin(ssid,password);
while(WiFi.status() != WL_CONNECTED)
{
delay(500);
Serial.print(".");
}
Serial.println("");
Serial.println("WiFi Connected");
server.begin();
Serial.println("Start Started");
//Show IP address
Serial.println(WiFi.localIP());
}
void loop()
{
while (ss.available()>0)
if(gps.encode(ss.read()))
{
if(gps.location.isValid())
{
latitude = gps.location.lat();
lat_str = String(latitude , 6);
longitude = gps.location.lng();
lng_str = String(longitude , 6);
}
if(gps.date.isValid())
{
date_str = "";
date = gps.date.day();
month = gps.date.month();
year = gps.date.year();
if(date<10)
date_str = '0';
date_str += String(date);
date_str += "/";
if(month < 10)
date_str += '0';
date_str += String(month);
date_str += "/";
if(year<10)
date_str += '0';
date_str += String(year);
}
if(gps.time.isValid())
{
time_str = "";
hour = gps.time.hour();
minute = gps.time.minute();
second = gps.time.second();
minute = (minute + 30);
if(minute>59)
{
minute = minute - 60;
hour = hour + 1;
}
hour = (hour + 5);
if (hour > 23)
hour = hour - 24;
if(hour>= 12)
pm = 1;
else
pm = 0;
hour = hour % 12;
if(hour < 10)
time_str ='0';
time_str += String(hour);
time_str += ":";
if(minute<10)
time_str ='0';
time_str += String(minute);
time_str += ":";
if(second<10)
time_str ='0';
time_str += String(second);
if (pm == 1)
time_str += "PM";
else
time_str += "AM";
}
}
// Check if a client has connected
WiFiClient client = server.available();
if(!client)
{
return;
}
//prepare the response
String s = "HTTP/1.1 200 OK\r\nContent-Type: text/html\r\n\r\n <!DOCTYPE html><html><head><title>GPSNodeMCU A-Arduino </title><style>";
s += "a:link {background-color: YELLOW;text-decoration: none;}";
s += "table,th,td {border: 1px solid black;}</style></head><body><h1 style=";
s += "font-size:300%;";
s += " ALIGN=CENTER> GPS Interfacing with NodeMCU</h1>";
s += "<p ALIGN=CENTER style=""font-size:150%;""";
s += "> <b>Location Details</b></p><table ALIGN=CENTER style=";
s += "width:50%";
s += "> <tr> <th>Latitude</th>";
s += "<td ALIGN=CENTER>";
s += lat_str;
s += "</td></tr><tr><th>Longitude</th><td ALIGN=CENTER>";
s += lng_str;
s += "</td></tr><tr><th>Date</th><td ALIGN=CENTER>";
s += date_str;
s += "</td></tr><tr><th>Time</th><td ALIGN=CENTER>";
s += time_str;
s += "</td></tr></table>";
if(gps.location.isValid())
{
s += "<a href=\"http://maps.google.com/maps?&z=15&mrt=yp&t=k&q=";
s += lat_str;
s += '+';
s += lng_str;
s += "\">Click here!To check the location in Google maps.</a>";
}
s += "</body> </html> \n";
client.print(s);
delay(100);
}
วันอาทิตย์ที่ 21 ตุลาคม พ.ศ. 2561
ESP8266 web server Home IOT

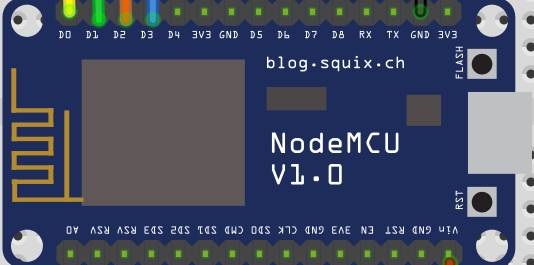
ESP8266
Use CH340G repalce the CP2102.
Open-source, Interactive, Programmable, Low cost, Simple, Smart, WI-FI enabled
FOR Arduino like hardware IO
Advanced API for hardware IO, which can dramatically reduce the redundant work for configuring and manipulating hardware.
Code like FOR arduino, but interactively in Lua script.
Nodejs style network API
Event-driven API for network applicaitons,
which faciliates developers writing code running on a 5mm*5mm sized MCU in Nodejs style.
Greatly speed up your IOT application developing process.
Lowest cost WI-FI
Less than $3 WI-FI MCU ESP8266 integrated and esay to prototyping development kit.
We provide the best platform for IOT application development at the lowest cost.

ขั้นตอนการลงโปรแกรม
และ ติดตั้ง
1.
โหลดIDE เวอร์ชั่น 1.6.5
ถ้าตัวอื่นก็ลองดูได้ครับผมใช้ตัวนี้
โหลดจาก https://www.arduino.cc/en/Main/Software

เลื่อนลงมาอีกนิดจะมีให้เลือกเวอร์ชั่น
Previous Release


Code

Previous Release
การติดตั้ง Board ESP8266IDE Sketch ที่แนะนำคือ เวอร์ชั่น 1.6.5

File
>Preferences>

http://arduino.esp8266.com/stable/package_esp8266com_index.json


ขั้นตอนการตรวจสอบว่าบอร์ดติดตั้งหรือยัง

MAP I/O

ต่อวงจรสำหรับ โรเจคนี้

Please Donate for long life blog
ขอเชิญร่วมบริจาค เพื่อสนับสนุนทุนการทำโครงงานต่อไป
ขอเชิญร่วมบริจาค เพื่อสนับสนุนทุนการทำโครงงานต่อไป
#include <ESP8266WiFi.h>
#include <WiFiClient.h>
#include <ESP8266WebServer.h>
#include <ESP8266mDNS.h>
MDNSResponder mdns;
// Replace with your network credentials
const char* ssid = "santi";
const char* password = "santi12345678";
ESP8266WebServer server(80);
String webPage = "";
Int gpio16_pin = D0;
int gpio5_pin = D1;
int gpio4_pin = D2;
int gpio0_pin = D3;
void setup(void){
webPage +=
"<h1>A-Arduino Farm</h1><p>pump#1 <a
href=\"socket1On\"><button>ON</button></a> <a
href=\"socket1Off\"><button>OFF</button></a></p>";
webPage +=
"<p>Pump#2 <a
href=\"socket2On\"><button>ON</button></a> <a
href=\"socket2Off\"><button>OFF</button></a></p>";
webPage +=
"<p>Pump#3 <a
href=\"socket3On\"><button>ON</button></a> <a
href=\"socket3Off\"><button>OFF</button></a></p>";
webPage +=
"<p>Pump#4 <a href=\"socket4On\"><button>ON</button></a> <a
href=\"socket4Off\"><button>OFF</button></a></p>";
// preparing GPIOs
pinMode(gpio16_pin,
OUTPUT);
digitalWrite(gpio16_pin, HIGH);
pinMode(gpio5_pin,
OUTPUT);
digitalWrite(gpio5_pin, HIGH);
pinMode(gpio4_pin,
OUTPUT);
digitalWrite(gpio4_pin, HIGH);
pinMode(gpio0_pin,
OUTPUT);
digitalWrite(gpio0_pin, HIGH);
delay(1000);
Serial.begin(115200);
WiFi.begin(ssid,
password);
Serial.println("");
// Wait for
connection
while (WiFi.status()
!= WL_CONNECTED) {
delay(500);
Serial.print(".");
}
Serial.println("");
Serial.print("Connected to ");
Serial.println(ssid);
Serial.print("IP address: ");
Serial.println(WiFi.localIP());
if
(mdns.begin("esp8266", WiFi.localIP())) {
Serial.println("MDNS
responder started");
}
server.on("/", [](){
server.send(200,
"text/html", webPage);
});
server.on("/socket1On", [](){
server.send(200,
"text/html", webPage);
digitalWrite(gpio16_pin, LOW);
delay(1000);
});
server.on("/socket1Off", [](){
server.send(200,
"text/html", webPage);
digitalWrite(gpio16_pin, HIGH);
delay(1000);
});
server.on("/socket2On", [](){
server.send(200,
"text/html", webPage);
digitalWrite(gpio5_pin, LOW);
delay(1000);
});
server.on("/socket2Off", [](){
server.send(200,
"text/html", webPage);
digitalWrite(gpio5_pin, HIGH);
delay(1000);
});
//////////////////////
server.on("/socket3On", [](){
server.send(200,
"text/html", webPage);
digitalWrite(gpio4_pin,
LOW);
delay(1000);
});
server.on("/socket3Off", [](){
server.send(200,
"text/html", webPage);
digitalWrite(gpio4_pin, HIGH);
delay(1000);
});
server.on("/socket4On", [](){
server.send(200,
"text/html", webPage);
digitalWrite(gpio0_pin, LOW);
delay(1000);
});
server.on("/socket4Off", [](){
server.send(200,
"text/html", webPage);
digitalWrite(gpio0_pin, HIGH);
delay(1000);
});
server.begin();
Serial.println("HTTP server started");
}
void loop(void){
server.handleClient();
}
สมัครสมาชิก:
บทความ (Atom)

-
 MAP I/O Wiring Node MCU >> GPS D1 (GPIO 5) >> RX ...
 -
Please watch this VDO First Hook up I2C LCD I2C LCD Connect LCD >>> Arduino GND >...
